Saturday, March 22, 2014

All the pieces!

Waistcoat madness continues.

One of the most interesting portraitures I have found is of Sir Henry Unton's Narrative from 1596. It shows some women at a Masq at his house.

For more information I reccomend reading Medival clothing and textiles book 2 on elizabethan waistcoat, it is the last chapter and is quite good. Just chock full of information.


Near the right hand corner you can what looks like to be a feast of some sort going on, Its actually a masquerade
"The scenes in the centre of the right-hand side of the composition show Unton’s life at Wadley House; he is depicted sitting in his study, making music, and presiding over a banquet while a masque of Mercury and Diana is performed "


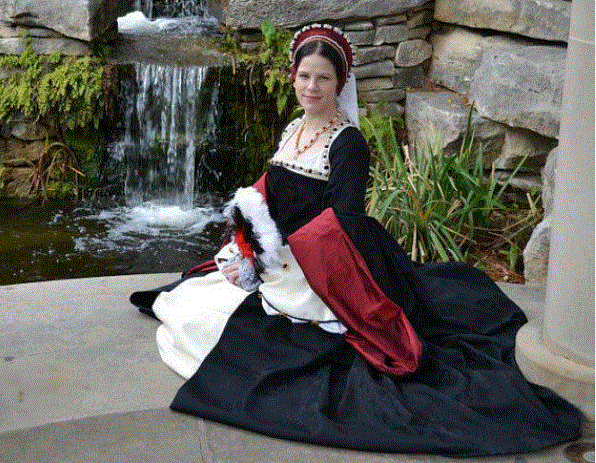
 You can see near the center left hand side of Lady dressed in her masq costume, which is complete with embroidered waistcoat and skirt, her hair is down, and most assuredly perfomers are following them around.

In England Masques were held in defiance of the stuarts rule during Queen Elizabeth's the 1st reign. Each lord and lady would be given a part, but it was taboo for them to actually act, so the players acted for them and the lords and ladies dressed up, as part of their part.  A bit confusing; but over all it makes sense.

However in my long journey I often look at the Margaret Layton portrait and wonder at it, because obviously she isn't wearing it for a masq, but in a rather informal setting; but neither was the waistcoat and design considered courtly garments either. So I am scratching my head at this. I am sure in a year, I will have two theories, one is cemented the other is still a mystery.

So without further ado, I have inked out the rest of the waistcoat panels, and have them dressed and ready for the slate frame when I get ready to work on them. After this right front panel is finished. I will be more than 50% of the way through this project.

Also Note, I have ordered this from the SCA stock clerk. It was written last year by Aimee Kratts.


Here is the summary.   " A monograph for costume historians and historical re-enactors. Author abstract: “Images of English embroidered jackets are available online and in print, but to date no one has published a comparative study of these jackets or a reference book of the shapes.  In this document, I have gathered information about twenty-five late sixteenth/early seventeenth century jackets and jacket fragments to compare the shapes, embroidery patterns and construction details.” Illus with b/w photos & line drawings. Bibliog, list of reference portraits, notes. 58pp, perfect bound. SCA"


 I cannot wait to dive into this new information and read up on it. Finding information and good portraits and paintings is like gold with this project. Each piece I seem to find is like a large puzzle, and sometimes a huge mystery awaiting to be discovered.

 Right front panel - In progress.

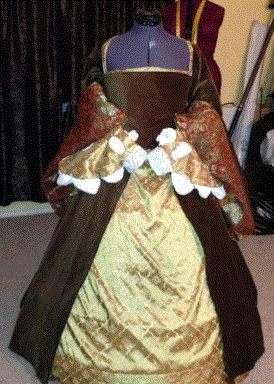
 Left front panel finished.
 Back panel finished - Needing some minor rewording for the back gusset.
 All the small pieces, this will most likely be the quickest embroidered pieces that I will ever do. Includes, the collar, sleeve cuffs, gussets and wings.
 Right Sleeve Panel - Marked with an R up at the top. For easy indentification

Left Sleeve Panel.

The sleeves will most likely take the longest, as they are some of the largest pieces of embroidery to this entire project.


Until then,

Happy Embroidery.
Heather

Friday, March 21, 2014

Polychrome Waistcoat - Left front panel finished and more Progress shots

Finishing the left front panel!
Hey I finished that panel in February 2014 YAY!
A spool and half of gold thread and 8 grams of Spangles.

.


And now I have started the Right front panel, Almost all of the multicolored silk work is nearly done. I'm working on all of the greenery right now and making MASSIVE amounts of notes, and a few adjustments here and there.

Meanwhile, I am sorting through and acquiring more research for the documentation that surely has grown a life of its own by now. So MANY tidbits and sifting through is like a taking a sugar shaker and sifting through it.

Surely I would like to do a style timeline, because waistcoats shapes and designs have changed over a few very short years believe it or not; and silk woman still makes me scratch my head as I am almost sure, that there is a connection. But I am still debating on it, actually. I really want this project perfect, when I am done with it. I want to be 100% happy with what I am making.

I understand no one is a more harsher critic than yourself. That's totally true.
So what I have been doing lately? Besides stitching and listening to ALOT of audio books, and Marathons of Game of Thrones.

Ive stopped and taken a few costuming commissions, and then researching my waistcoat. However Ive gotten a bug, and decided to draw out and ink in the rest of the pieces of this waistcoat. Which will save me time later. If I am going to push myself and finish this project this year, It's a good idea.

However, I've messed up a bit and thought to do all the smaller pieces on one panel, which would make sense, then forgot that I had to have 5 small gores, and thus I lost space. So I need to redo that panel. I did however, draw and inked out both sets of sleeves. I rechecked them about six times to make sure I have room for the sleeve allowances, and to make sure I am embroidering the right sides without freaking out, and embroidering the wrong side, only to find out too little to late.

I'm a little paranoid that way, SUCH a large project, and the LAST thing I want to do is to think I have finished the sleeves and find out that I didn't and did the wrong side. How depressing would that be?

Left sleeve, You can see that I accidently drew outside the pattern line, but I can fix that when I sew it together. The lines will be covered with Plaited Braid stitch. So its not that big of a flub. At the very top, I marked, L and R. To define which sleeve is which, in case people ask me about it.

Both sleeves inked out.

I'll update the blog a bit later, with the final panel of the smaller pieces. In total, it will be six panels. But these sleeves are HUGE. In hindsight, I should have done those first, instead of the back. But It always seems when one is learning to do something, it seems to me. I do them backwards. But still, this is a wonderful learning project; and I am utterly and very proud of myself with sticking with this project.


Until then, Happy Embroidering.

Heather

Tuesday, January 28, 2014

High court Tudor Gowns


All things Tudor. Historically accurate Tudor gowns are simply awesome. There is nothing quite like wearing one and feeling like you stepped out of portrait.


Elizabethan Polychrome Waistcoat Recreation. Left Front Panel - Currently in progress.

Hey! Welcome back! I am playing catch up. My Facebook was my personal costuming blog and some of these posts really are just the tip of the iceburg.
So I have set a goal of completing my waistcoat this year, before kingdom A&S 2015. Wish me luck!


 The Color scheme got bigger :) I try not to walk into embroidery stores any more. I'll want to see their stash of Soi Perlee.


 This is really daunting. When starting over again from scratch after embroidering a marathon of one panel, but to consider how awesome it will be when the entire jacket is finished. I had messed up the patterning, but fixed it. Extra lines on the construction, one won't be able to see once the waistcoat is complete and I can live with that!

 I decided a different plan of attack, by doing all color schemes one at a time. It went by really fast.


 Referring to my own color scheme, I will pull out the finished piece and look at it for guidence. I used to do this with the picture from Christies.


 When I got to this point, I thought it would be nice to have a break. So I took one for a couple of months, then picked it up again to do the leaves.


 Starting the Plaited Braid stitch, it really goes by pretty fast.


 This is the current progress to date.
And check this out! The WHOLE picture finally. Its interesting to see the bottom motifs finally.


Elizabethan Polychrome Waistcoat Recreation. Back Panel

Progression of my Elizabethan polychrome waistcoat.
Its alot of hours, already, over 200 hours into it. (I Lost hour count!)
Feedback, questions and comments are appreciated.
Supplies

http://www.threadneedlestreet.com/ - 50 Meters 3 ply twist silk thread, LOTS of colors.

http://www.berlinembroidery.com/ - Spangles

http://thistle-threads.com/index.html - Gold thread

I was so happy to find this! Its flat! Which means it can be patterned!

Which I did, after using the Tudor Tailor's awesome waist coat pattern to my size. Why do all this work and not wear it?
I squared it up with 1" squares and scaled it down on the paper I printed off, then proceeded to sketch it out on my scaled up drawing.

Tradtionally the prick an pounce method was used, but I have a small child (at this time, she's much older than now) and anything that grabbable and messy shouts more clean up procedures later on. I have to years fine arts training at Traverse Bay Area Intermediate School District. So I thought a light table would be a perfect example. Only problem is I don't have a light table, so plan B.
Plastic!

I enlarged the pattern fr the sleeves and back panel. Plus I am able to turn this over and mirror the front panel, which was traditional in period.

Thread color selection based on the extent example.
I started out with the back as it was the biggest panel. I made a flub though. I didn't pattern the back slit for the gore. Later on during construction of the waistcoat I will have to add that in very carefully.
 Starting to stitch, I hand to learn each stitch from the very beginning. I really started this project with not knowing ANY embroidery stitches. Boy that was a challenge. Most of the first stitches were later replaced later on when my technique got better. But this photo shows the progress.

Kitten help! Believe it or not, she swallowed my embroidery needle and lived! I still have the xray somewhere of the emergency rush to the vet. Surely one of her nine lives was flushed own the drain with that stunt. I was so put out, I didn't pick up the project for a good while. My art could've killed my cat!


Over the course of the next year, and lots of Audible books. Next was the next challenge. Learning the Plaited Braid stitch. Wow. It was the too the point, after being frustrated I asked the Elizabethan Costuming group on Facebook for help. I got classes on skype! and finally learned it. I also had Womens dress patterns of the 17th century which has great step by step instructions as well.

The Trials below


 Finally getting somewhere! Its supposed to look like a bunch of staked upside down pretzles.
 What I learned. Wide Plaited Braid Stitches do NOT work. They look really messy.

Looks like I nailed it! After this project I'll be a pro! At least this is what I tell myself.


 Yup thats me. Rocking it out!

 All the little chain stitched swirls were added on later, as they are time consuming and its easier to go in rythm with one thing at a time.
 All swirls completed, added fine details and small chain stitch vines.
 Finished! I got to add Spangles after that.
 Man! what a year this project was. I managed to impress myself. I was in complete awe.
 Off the frame and somewhere safe, so I can admire it.

All done! Onto the next!